Last year we got chickens. The coop is in our backyard. The birds produce eggs and require daily care — feeding, watering, collecting eggs, cleaning up after them. It is a small but constant part of our routine now.
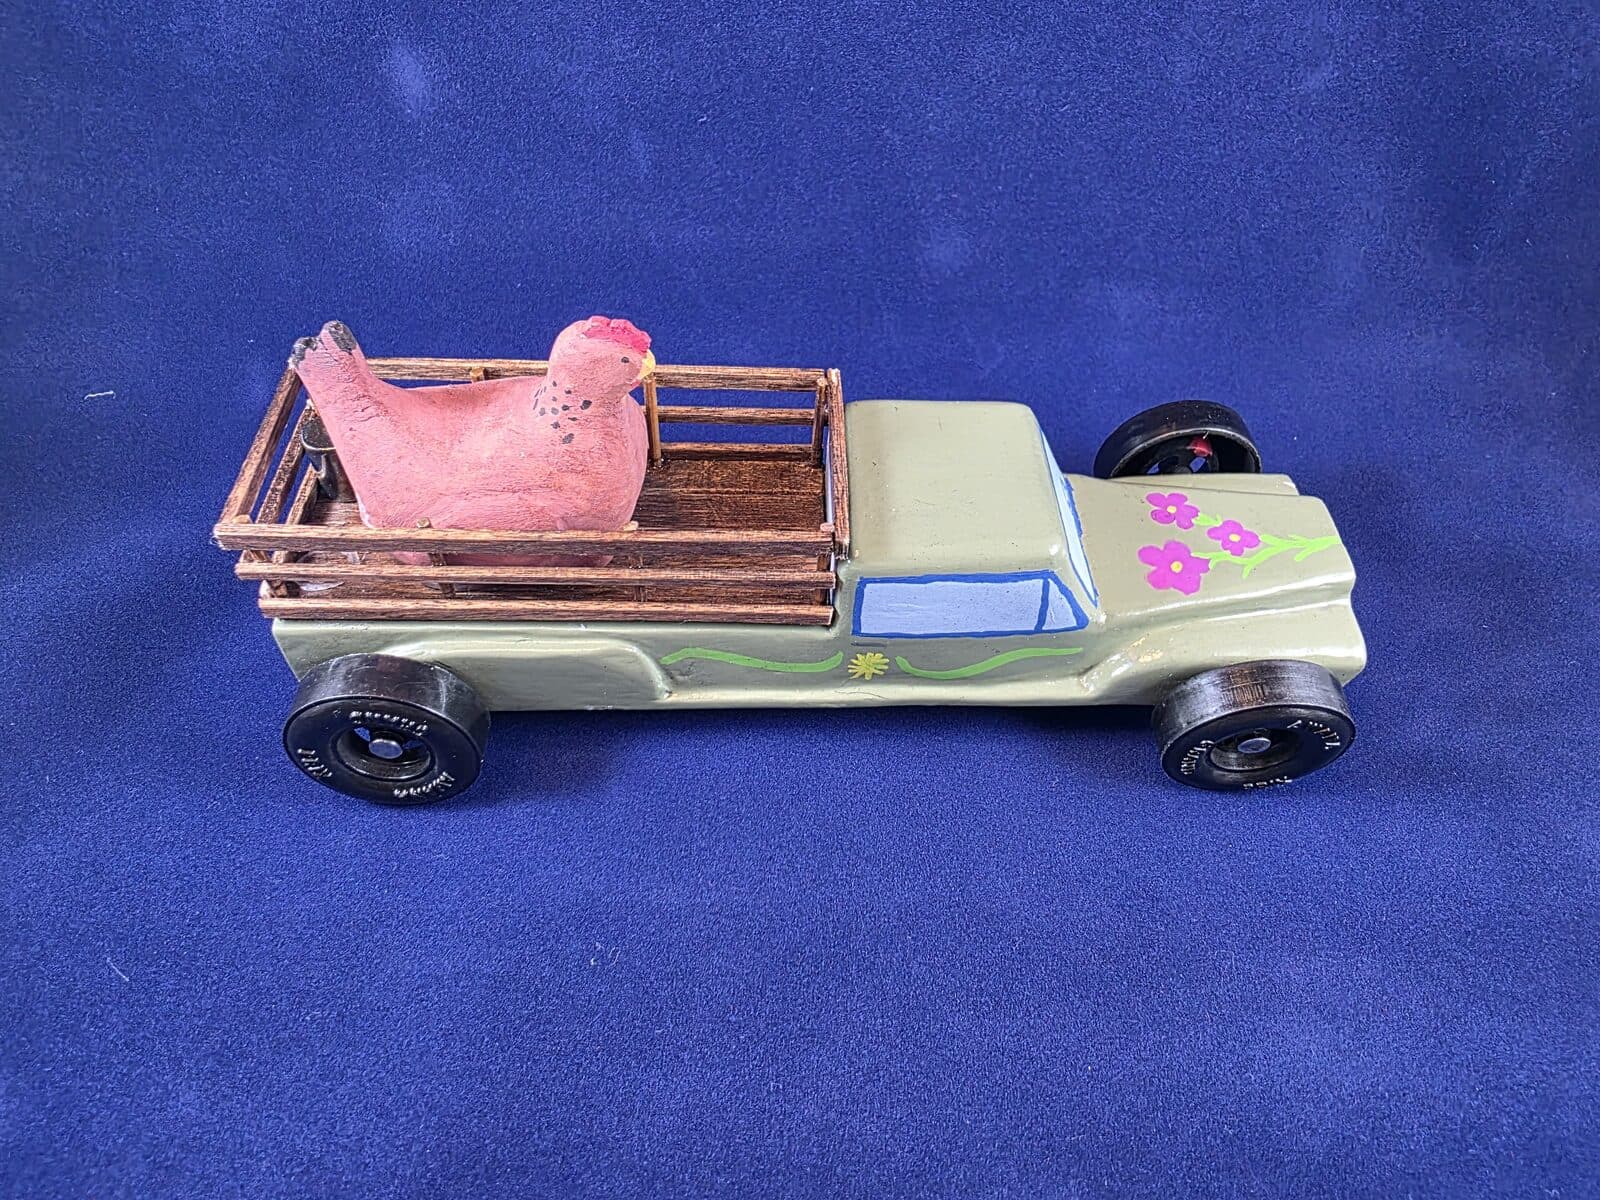
When our local Awana group announced its Grand Prix would include a Parents and Staff division this year, my wife already knew what she wanted to build. A pickup truck with a chicken in the back. That was the entire brief. The car came in first place in design within our division and fourth place in speed. The speed result was not an accident. She did not build the car for speed. She built it for the chicken.
The brief
My wife is not an engineer. She does not want to be involved in deciding axle geometry or tungsten cylinder placement. She has opinions about how things should look and she has opinions about which animals are good. Chickens are good animals.
The full brief, verbatim: "A pickup truck with a chicken on the back."
This is the kind of brief I want when I am building something for someone else. One unambiguous image. No committee. There is nothing to second-guess, just a clear picture of what success looks like.
What I added to the brief
My wife had given me the truck and the chicken. I had to fill in the rest.
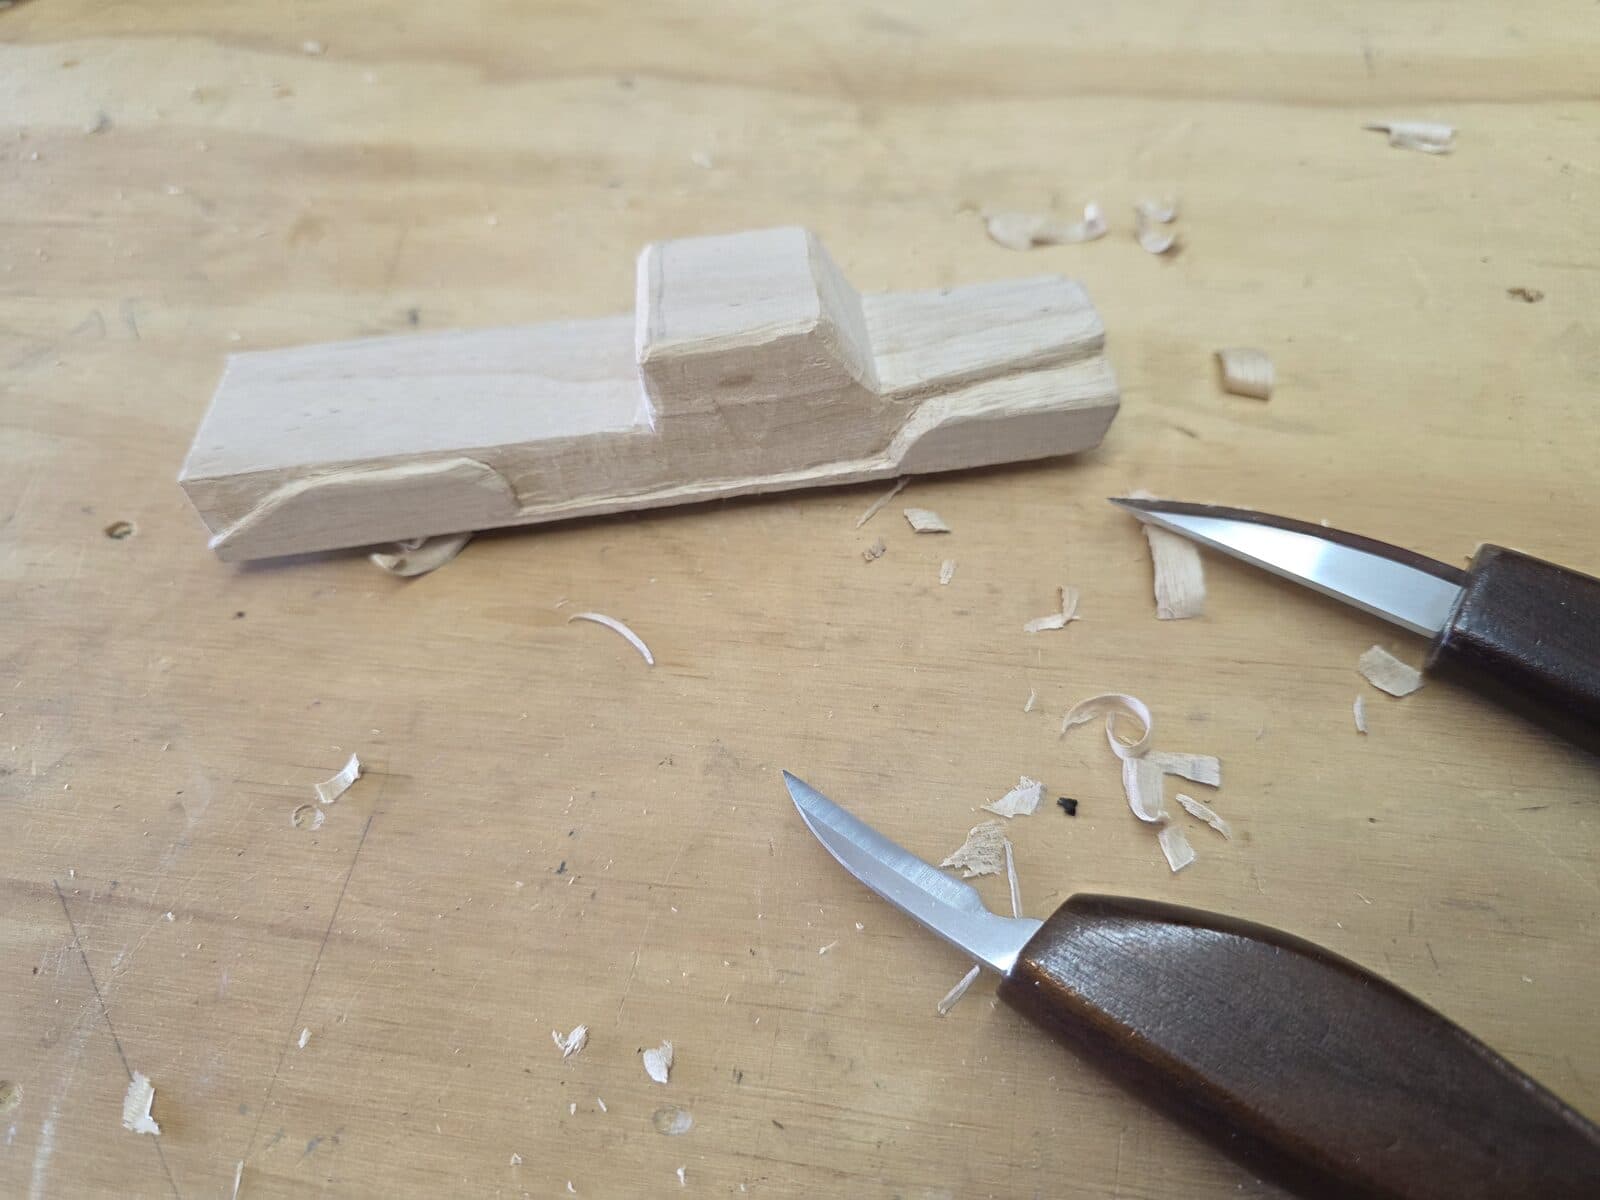
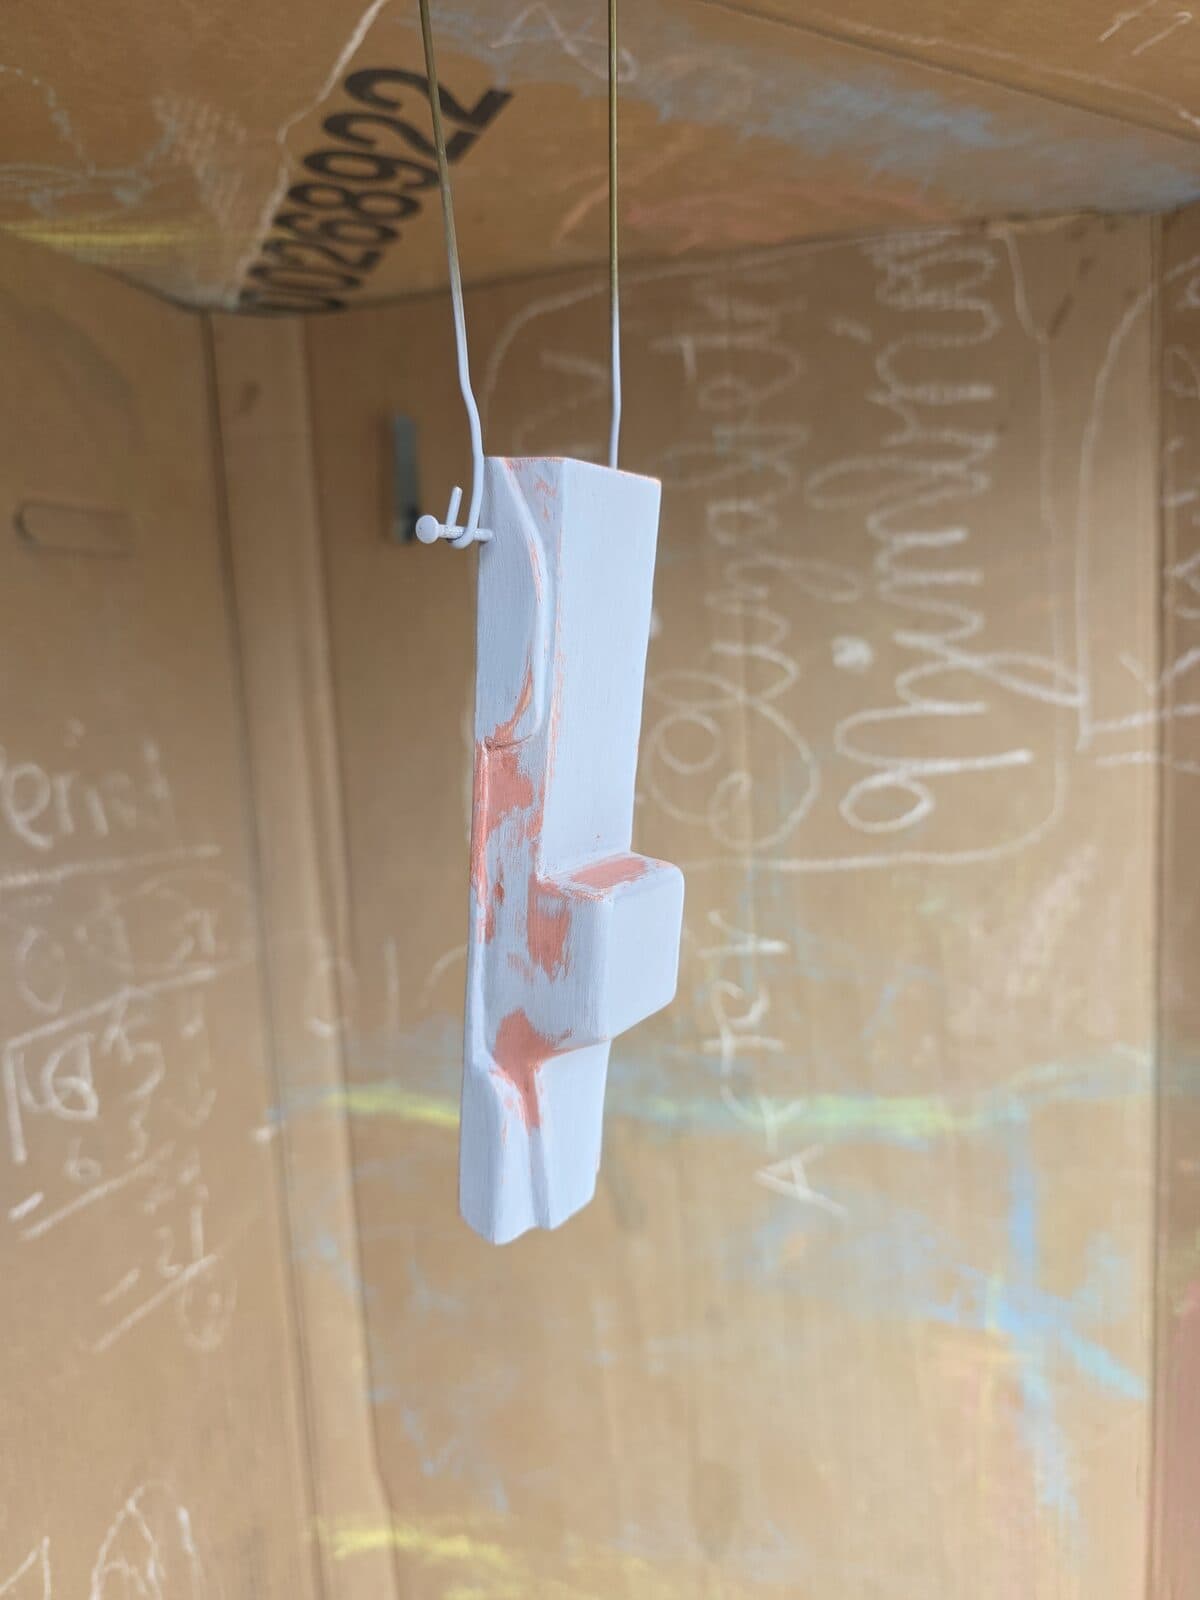
I picked the body style: a small flatbed pickup, more retro than modern, with a slightly sloping hood and a squared-off cab. Something a chicken would plausibly ride in. I drew it up in Tinkercad, dropped it onto the standard pinewood derby block silhouette, and exported the orthographic views the same way I did for our kids' cars. Printed the views, glued them to the block, carved to the lines.
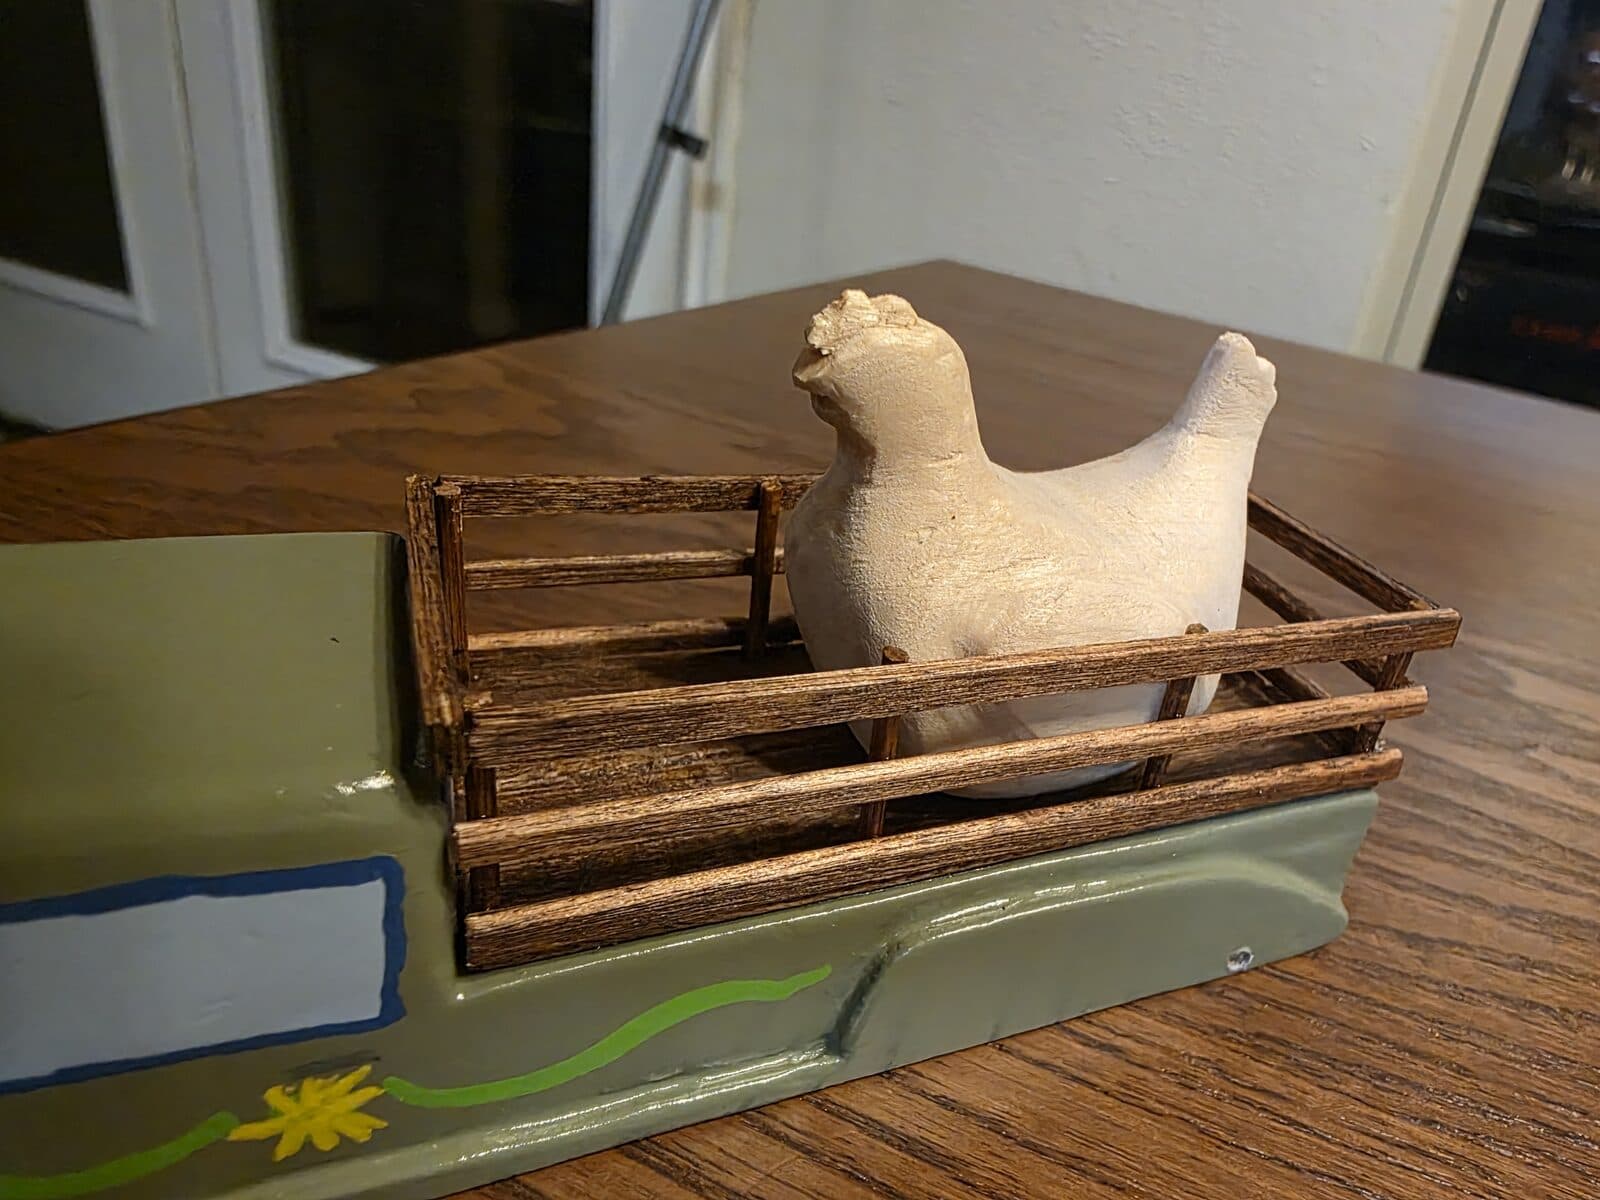
I also decided the bed needed railings. The chicken needed something to stand against, otherwise it would look like it was floating in an empty truck bed. The railings ended up being the part of the build that took the most fiddly work, and they are the part of the finished car my wife likes best.
Carving the chicken
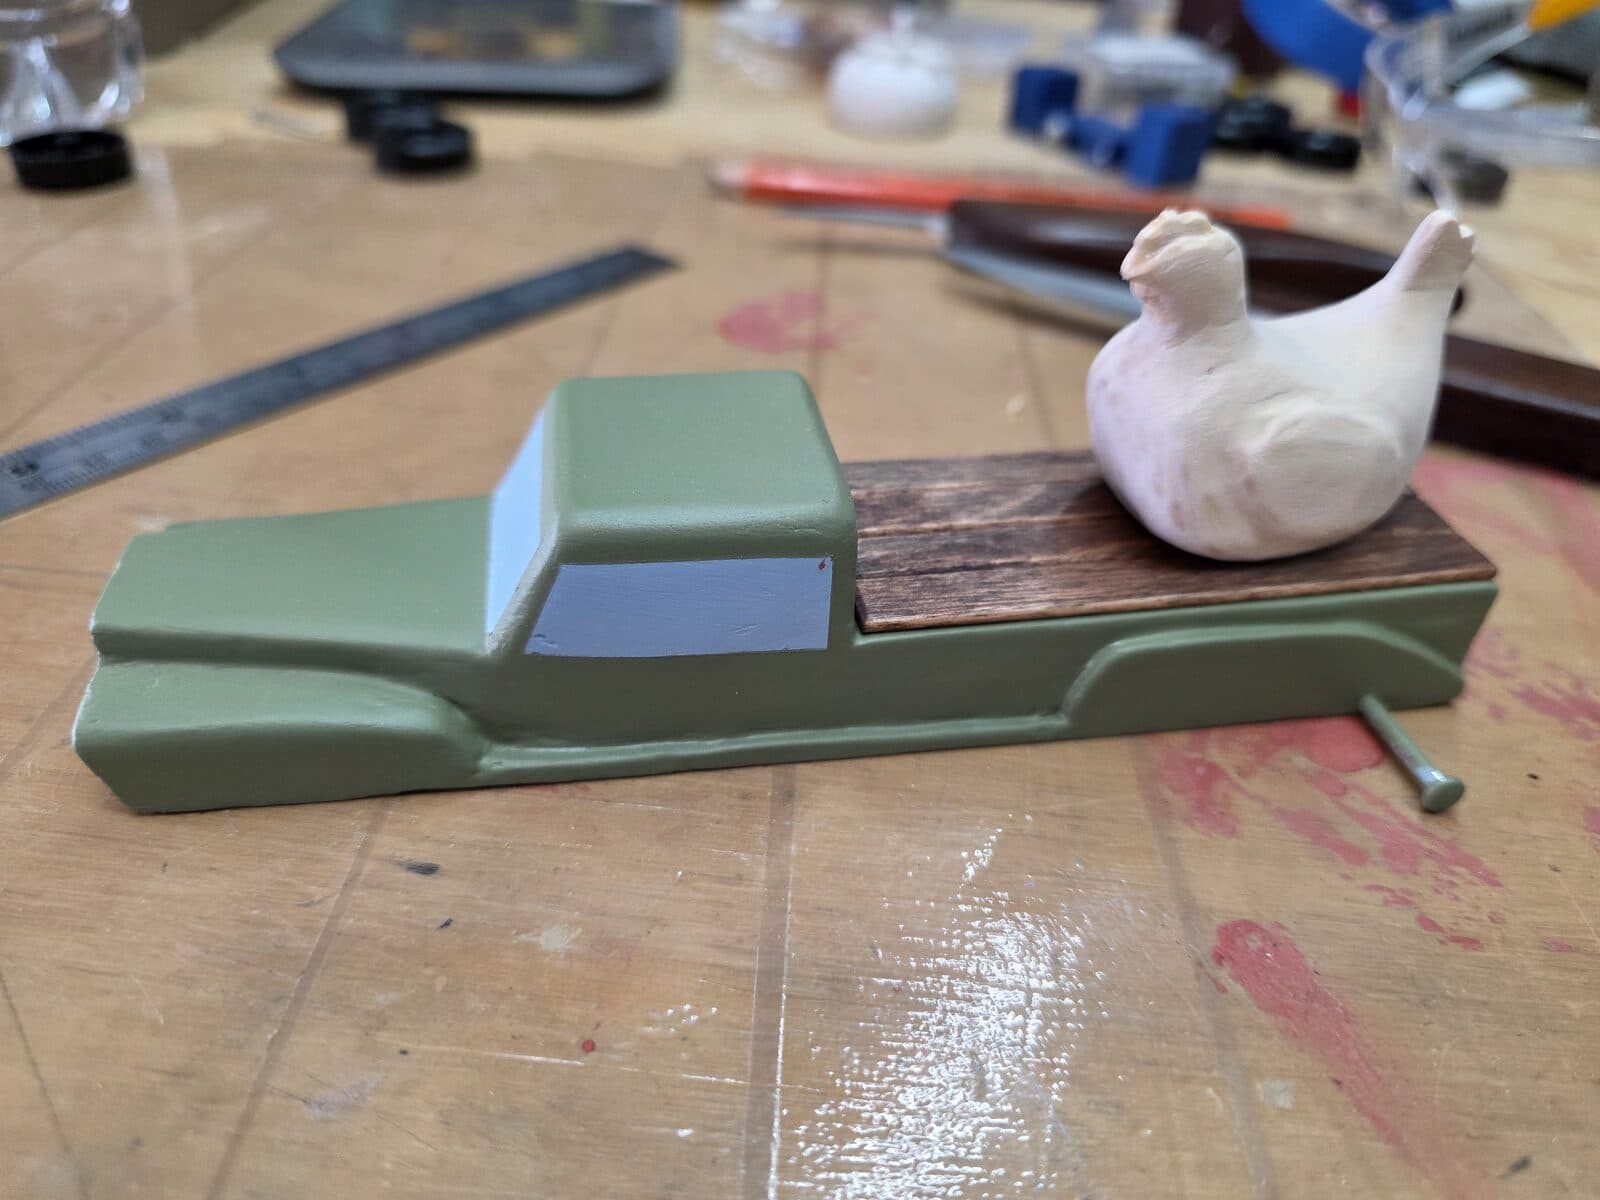
The chicken is its own piece, carved separately and glued into the bed at the end of the build. I carved it from a small block of basswood, not the pine of the kit. Basswood is softer and more uniform than pine, which makes it easier to carve curves and small features cleanly. Pine is fine for the long flat surfaces of a car body — for a small sculptural piece with feathers and a beak, basswood is the right material.
The chicken is about an inch and a half long. I carved it over several evenings, going back to it between work on the other cars in the family lineup. To get the proportions right, I found a 3D model of a chicken online, exported a silhouette view, printed it, and used it as a reference next to the carving — the same workflow as the other cars in this build.
The chicken is glued in place permanently. Pinewood derby rules prohibit moving parts on the car, so the chicken is a fixed sculpture, sitting calmly in the truck bed, looking like it has accepted its situation.
The body finishing, same as the kids' cars
The truck body went through the same multi-step finishing process I have written about in the shark post and the T&T car post:
Automotive car putty over every tool mark and seam. Cure. Sand back. Spot in more putty where there are low spots. Sand. Two coats of high-build filler primer. Wet-sand between coats with 600 grit. Two cycles, until the whole body is a uniform matte-gray surface with no visible texture.
For an adult-built car this matters even more than for a kid's. People look at adult entries differently — there is no charity for "well, the kid did most of the work." The car has to look like a finished object. The filler primer process is the single biggest reason this car looks the way it does in photos.
Color and detail, my wife's part
She picked olive green for the body. Not a flashy color. Not bright. Just the kind of green a working farm truck would actually be, which is the right call for a truck that carries a chicken.
I sprayed two coats of olive green over the primed body. Light coats, twenty minutes between them, full cure overnight before she touched it.
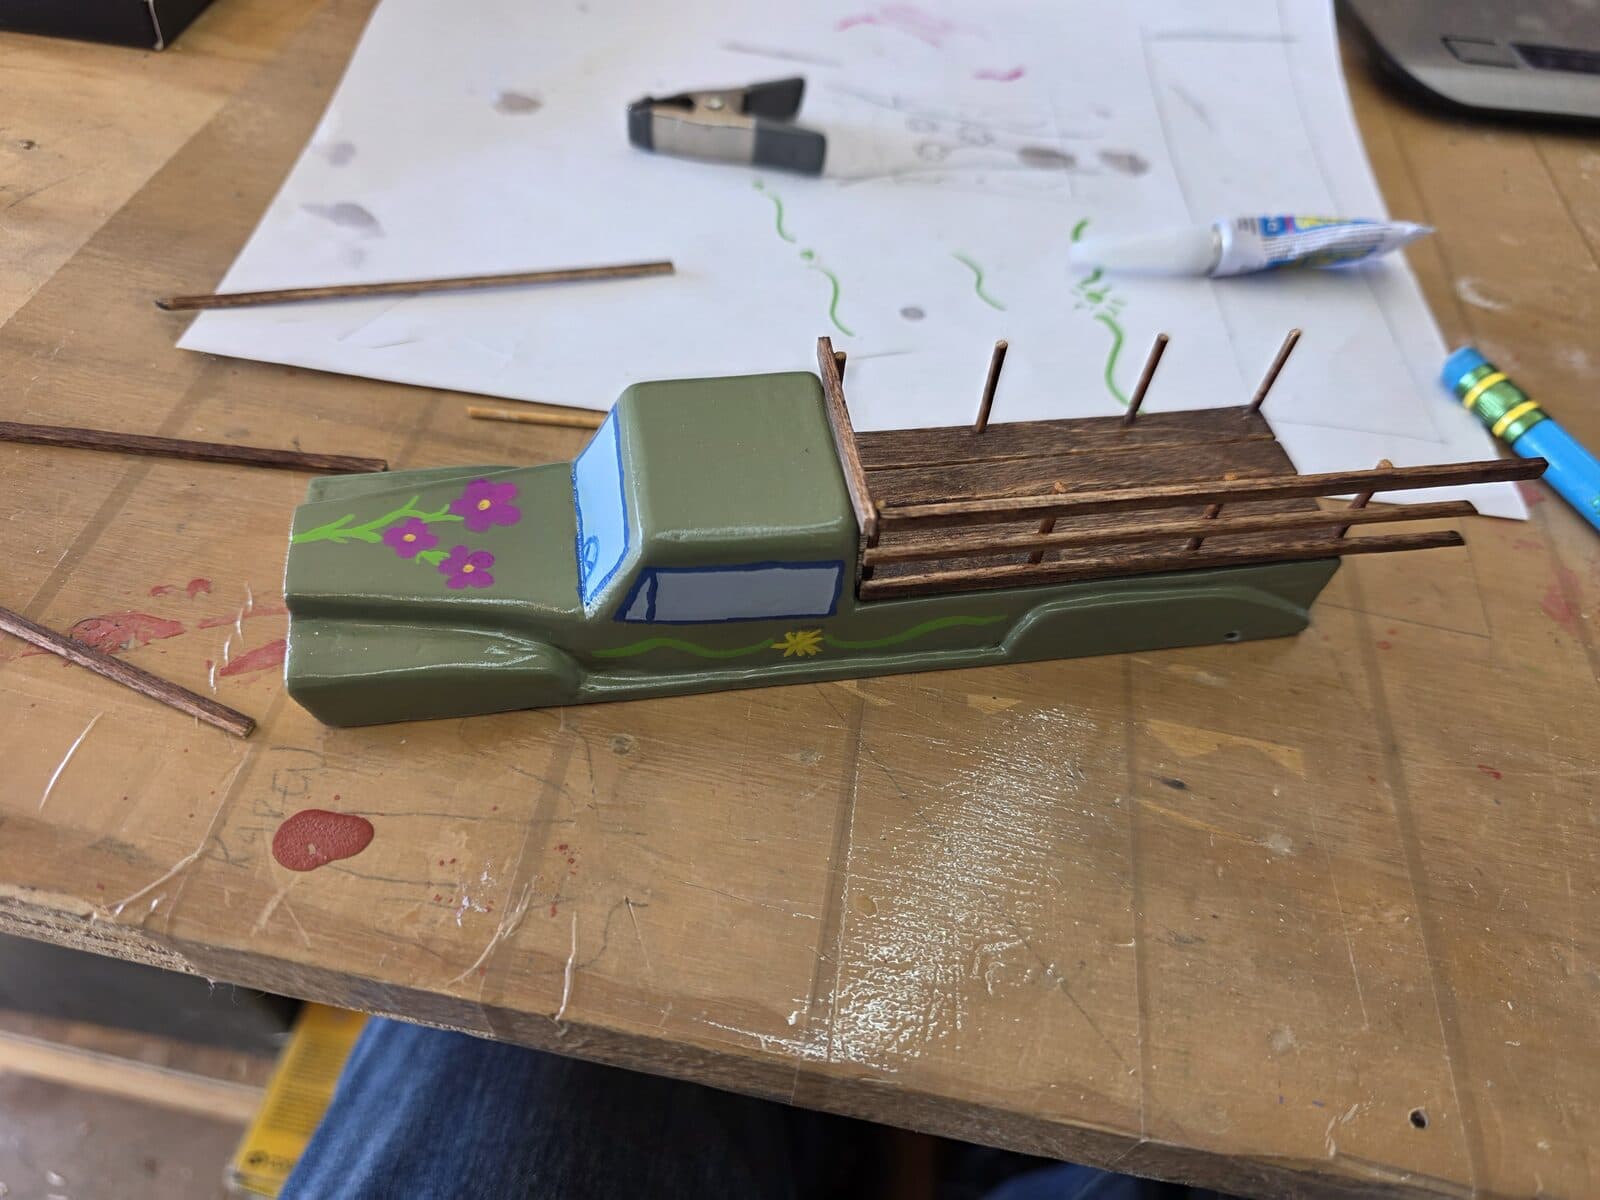
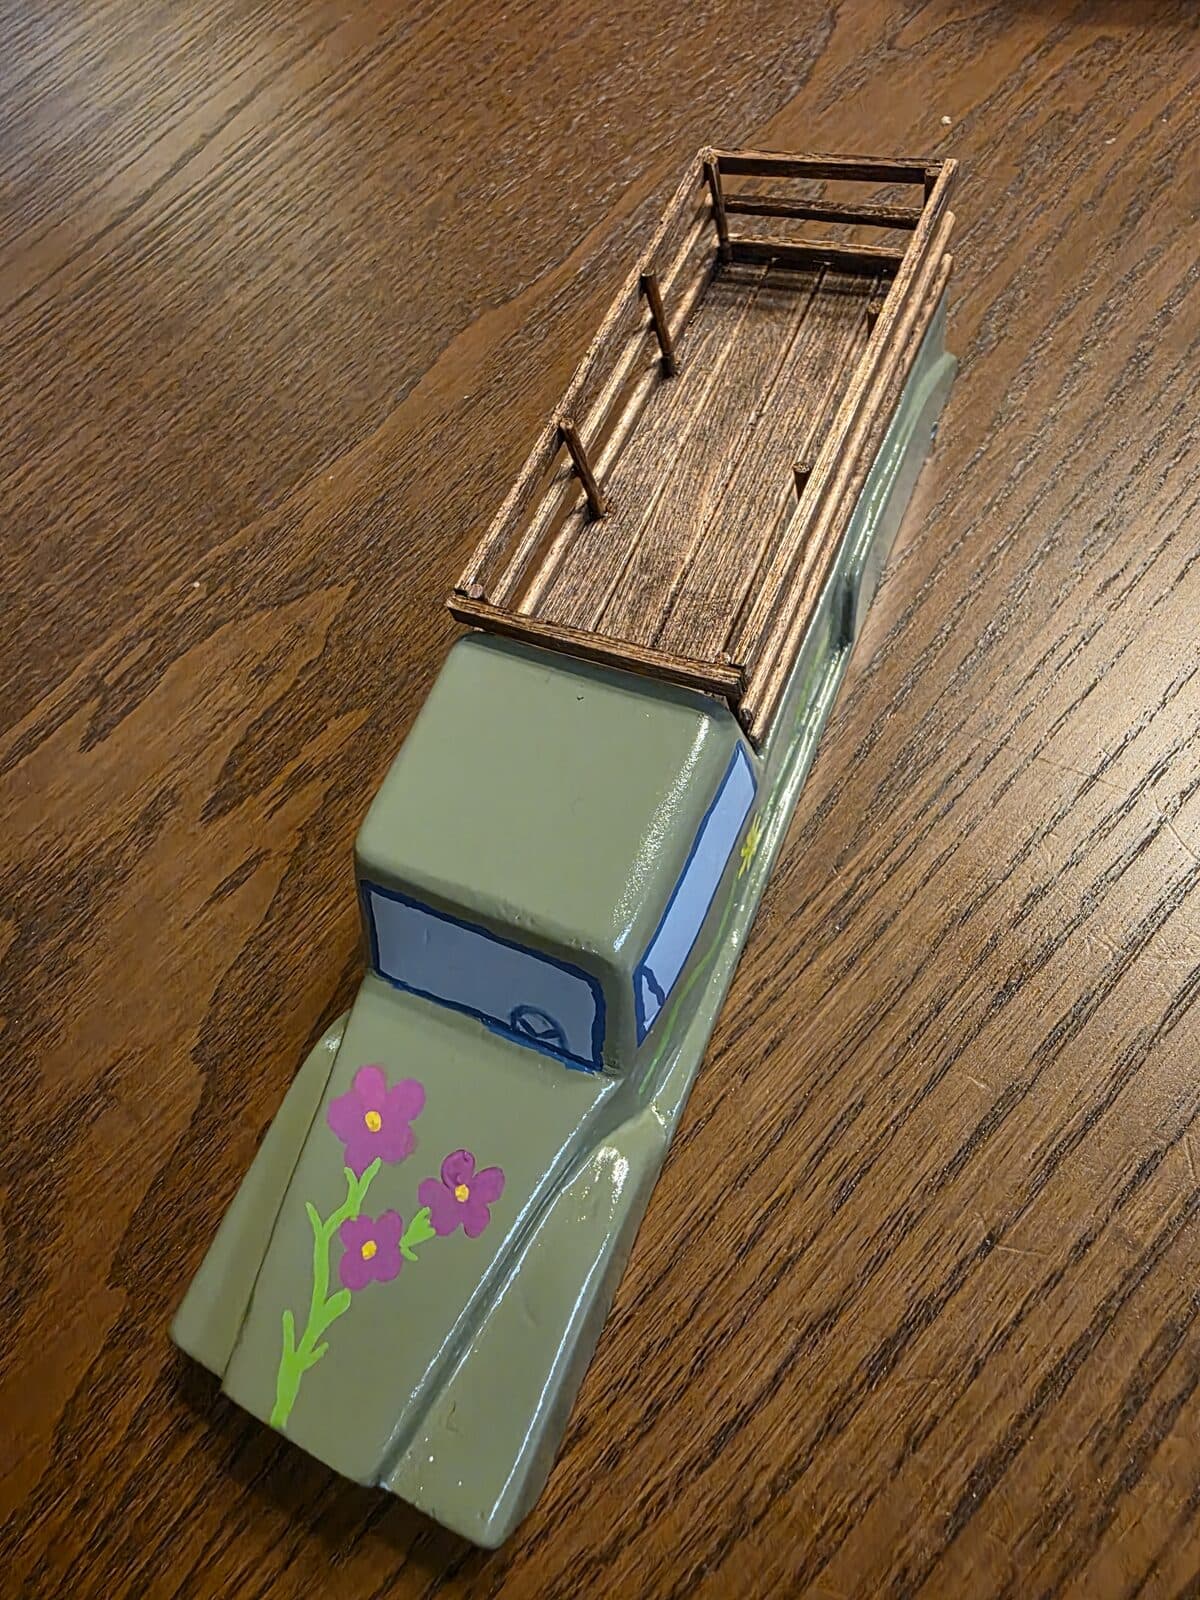
Then she did the details with acrylic paint markers. She painted the windshield and side windows blue. She painted small pink flowers on each side of the body and a yellow daisy on the front of the hood. There is a thin green vine running between the flowers on each side. The cab roof has a small painted highlight in lighter green that suggests light coming from above. None of this was in the original brief. All of it was her.
After she finished, I clear-coated the whole car with two light coats of acrylic clear spray. Standard finish protection.
The bed, the longest evening of the build
This is the part nobody asks me about and I would happily talk about for an hour.
The flatbed is wood stained dark, with five railing posts on each side and three horizontal rails connecting them — like a small wooden cattle fence. The posts and rails are craft store popsicle sticks, cut to length and stained with dark wood stain.
To attach the posts, I drilled small holes into the truck bed at each post position and inserted toothpicks as anchor pins. The toothpicks went through the wooden post and into the body, with super glue holding everything in alignment. The horizontal rails were then super glued across the front of the posts at three heights, creating the railing.
This took an evening. Each post had to be cut to the same length, drilled straight, stained to match, and aligned with its partners on both sides. There is no obvious way to clamp a structure this small while the glue cures, so I held everything by hand for a couple of minutes per joint. If I were doing this again, I would build a small jig with slots for the posts at the right spacing and assemble the railing flat on a table.
The chicken got installed after the railings were on. A drop of glue under each foot.
The engineering, but not for speed
This is where this car diverges most from the kids' cars and from my own gold car.
I used the PRO Driller to drill straight axle holes and to slightly extend the wheelbase. That is the minimum competent engineering for any car. I did not cant the rear axles. I did not raise a front wheel. I did not bend the steering axle for a rail rider configuration.
My wife was not building for speed. The car has a chicken in it and sculpted railings and painted flowers. The center of mass is higher than ideal because the chicken sits up on top. Going through all the engineering work to extract another tenth of a second would have been a waste — the car was already going to be among the slowest in our division by design.
The lesson here is one a lot of derby parents miss: engineering effort should be proportional to the goal. If the goal is to win speed, you do all the techniques. If the goal is to win design — or to have fun, or to put a chicken in a truck — you do enough engineering to make the car competent and you stop.
Race day
The chicken truck ran fourth in speed in our Parents and Staff division. It had a good run down the track — competent, steady, no mechanical surprises. It simply was not engineered to win on the clock, and it did not.
At the awards portion, the chicken truck won first place in design in our division.
Building with a spouse, not a kid
This was my first time building a derby car with an adult instead of a child, and the dynamic is different.
With our kids, the build is shaped by what they can and cannot do at their age. Five- year-old Elias chose his shark and painted it; I did everything else. Nine-year-old Karen co-designed her car in Tinkercad and painted her own details. The build splits according to motor skills.
With my wife, the split was about interest, not ability. She wanted to define the concept, choose colors, paint the details with markers. She did not want to learn to use a carving knife or run a 3D printer. There is no negotiating about safety, no managing of attention spans — just a partner saying "I want it to look like this" and another partner saying "here is how we get there." The collaboration is the entire point of the project, not a side effect.
If your derby has a Parents and Staff division and you have a partner who would think a chicken on a truck (or a cat on a couch, or whatever your equivalent is) is funny, build one. It does not need to be fast. It needs to be the thing the two of you would laugh about a year later.
We still have the chickens, by the way. They have no idea any of this happened. They produced eggs this morning.