My daughter Karen is nine. She built her pinewood derby car this year on a parallel track to her little brother's — same kit, same workshop, same week of deadlines — but the cars they ended up with looked nothing alike, and the way we built them was not the same either.
Elias is five. He picked his design from a catalog of 3D models and let me handle everything between "I want a shark" and "here is your finished shark." At nine, the deal changes. Karen does not just pick. She designs. She knows what her car should mean, and she can paint precise details herself with a steady hand. This post is about her car, and about what shifts when your derby builder is old enough to be your actual collaborator.
Karen's job, part one: have a concept
Karen is in the T&T program at our Awana club — Truth and Training, the older-kid program for grades three through six. Kids in T&T earn ranks over four years, each year with its own color: yellow, green, blue, red.
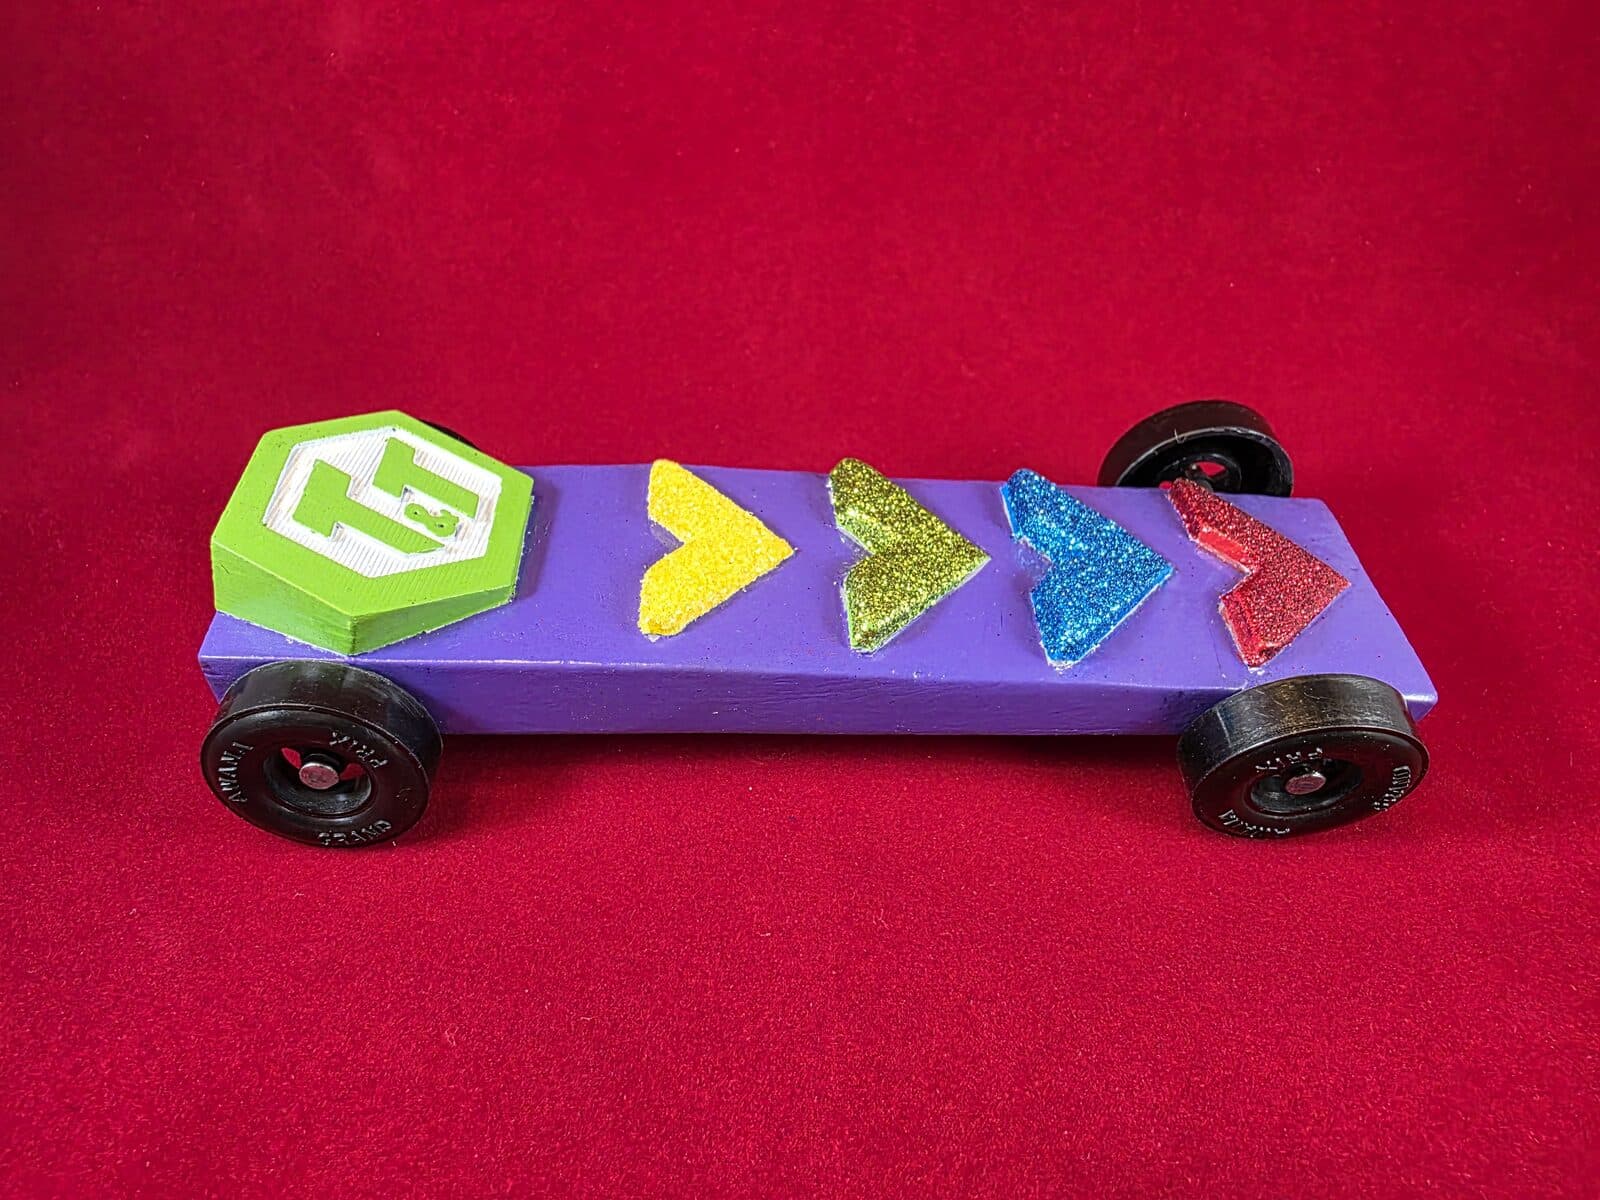
When we sat down to plan her car, she did not pick a model from Printables. She told me what she wanted: a car that said "T&T" on the front in the program's hex logo, with four chevrons running down the top in the four T&T colors, one per rank. Body purple. Chevrons sparkling.
That was the concept. She had it before I asked.
Elias picked a shark because sharks are cool. Karen picked T&T branding because she belongs to T&T and wanted her car to announce that. A nine-year-old can make a car about identity. A five-year-old makes a car about wanting a shark. Both are correct ways to be the age you are.
Karen and me, in Tinkercad
This is where her car diverged from Elias's most sharply. Instead of finding a 3D model online and adapting it, we opened Tinkercad on the laptop and built her design from scratch. Together.
Tinkercad is a free browser-based 3D modeling tool that is intentionally simple — you combine primitive shapes into more complex objects. The right tool for an actual nine-year-old to use.
We started with a virtual pinewood derby block at the exact dimensions of her kit. Then she added the T&T hex logo as a flat plate at the front. Then she added the four chevrons down the top — yellow, green, blue, red, sized to the width of the body. She positioned each one. She nudged the spacing. I helped with the mechanical parts (where do the axles go, how do the wheels fit), and she handled everything aesthetic.
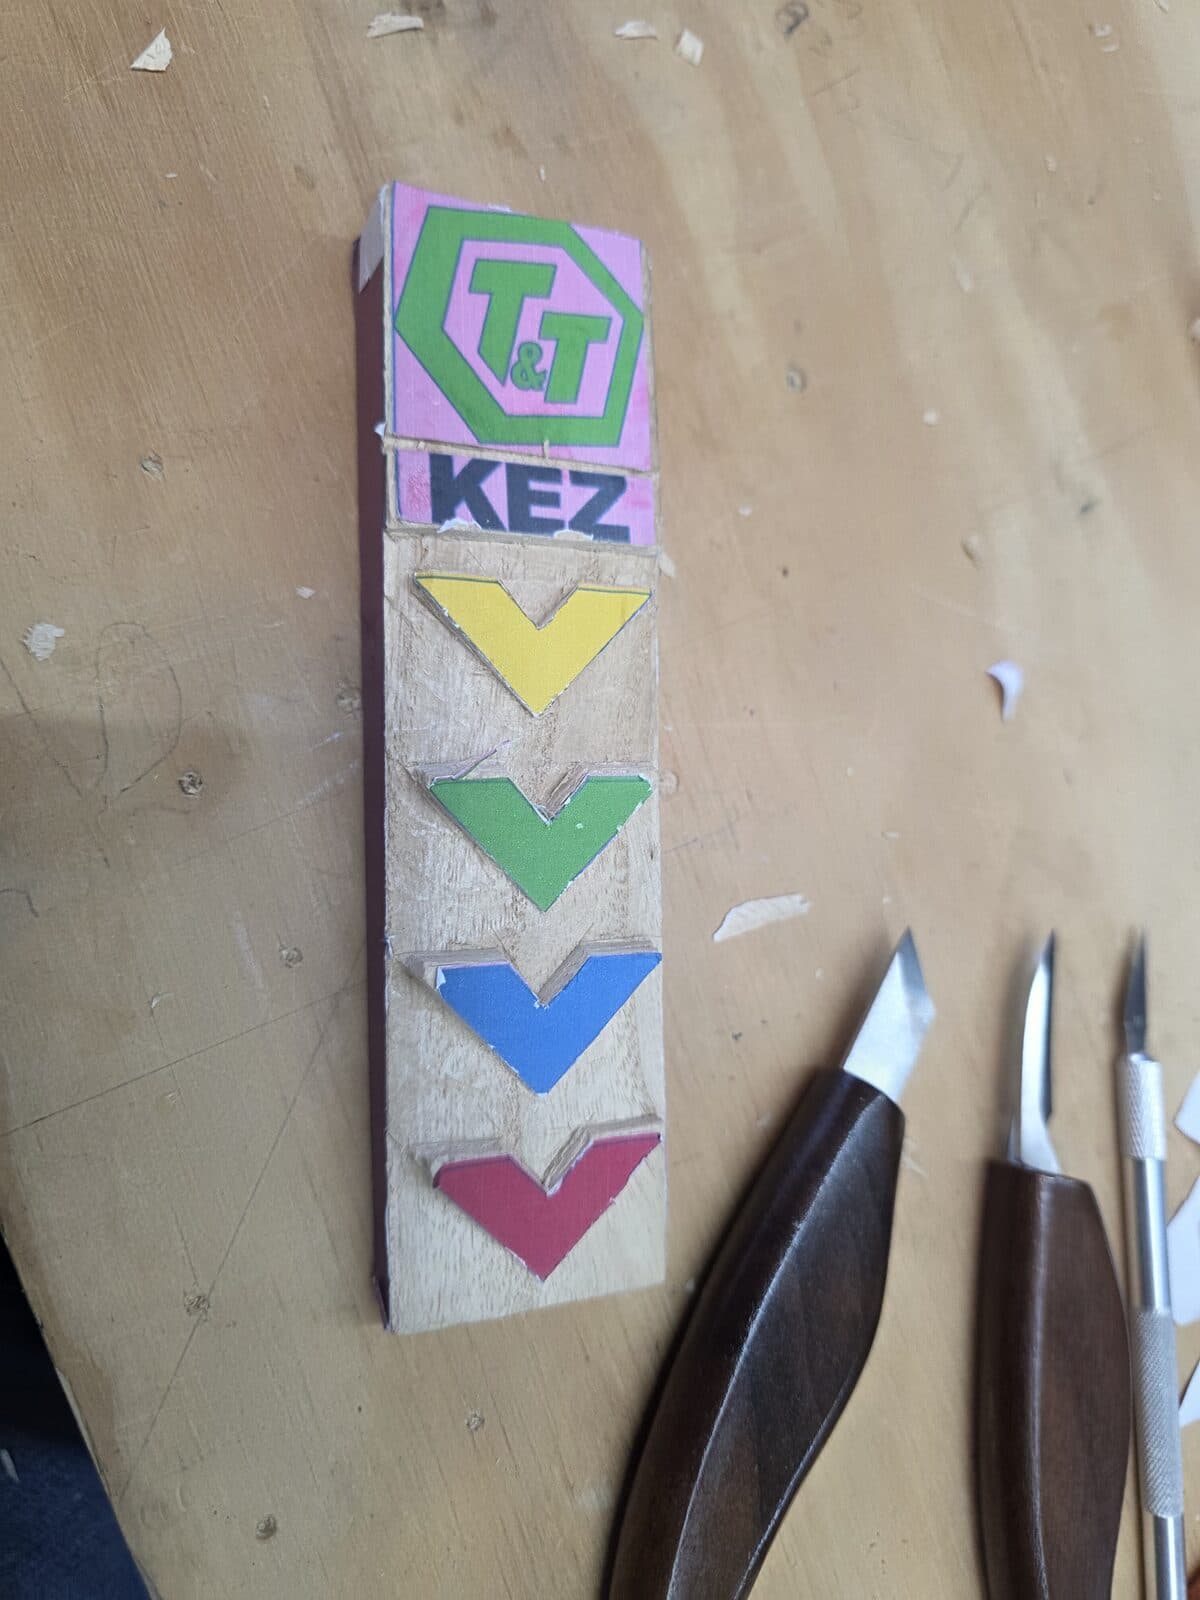
By the end of the afternoon, we had a complete 3D model of her finished car. Karen understood the design at a level Elias never could have with the shark — she had built every shape, knew why each one was the size it was. I exported orthographic views, printed them, and glued them to the block. Then I carved with my wood carving knives, following the paper templates. Karen watched some of it but did not do any cutting. The collaboration was in the design and the painting.
Carving the chevrons, 3D printing the logo
The four chevrons running down the top of the car are carved into the pine body itself. Each one sits slightly proud of the surrounding surface — a raised V-shape about an eighth of an inch high, with crisp edges. I carved them with the curved detail blade of my wood carving set after the rough body shape was done. Pine is soft, which makes it easy to remove material — and easy to remove too much. I worked across two evenings, gradually removing wood between each chevron and going back to clean up where the fibers had torn rather than cut cleanly.
I carved them instead of 3D printing them because a carved chevron is part of the car, while a printed chevron is something stuck to the car. The visual difference is subtle but real, and Karen wanted the chevrons to belong to the body.
The hex T&T logo at the front is the one part I did 3D-print, and I printed it hollow underneath — with a recessed cavity sized to hold tungsten cylinder weights from the Pinewood Pro tungsten cylinder set. Same approach as the shark's rocket pods. The decorative part the kid loves is also the weight system. From Karen's perspective, her logo is a logo. From the car's perspective, the logo is about three ounces of tungsten hidden inside what looks like decoration.
The body finish, but harder
The car went through the same body-prep process as the shark — putty, sand, more putty, sand, filler primer, wet-sand, again. (Full detail in the shark post.)
What was harder on Karen's car: keeping the carved chevrons crisp through the putty-and-sand cycles. Each round of sanding wants to round over the sharp edges of carved details. I had to sand carefully around each chevron, using a small sanding block on the flats and avoiding the raised V-shapes themselves. If you are carving raised details into a pine body and taking it through filler primer, plan for this. The chevrons will not survive aggressive block sanding. They will survive careful selective sanding if you slow down.
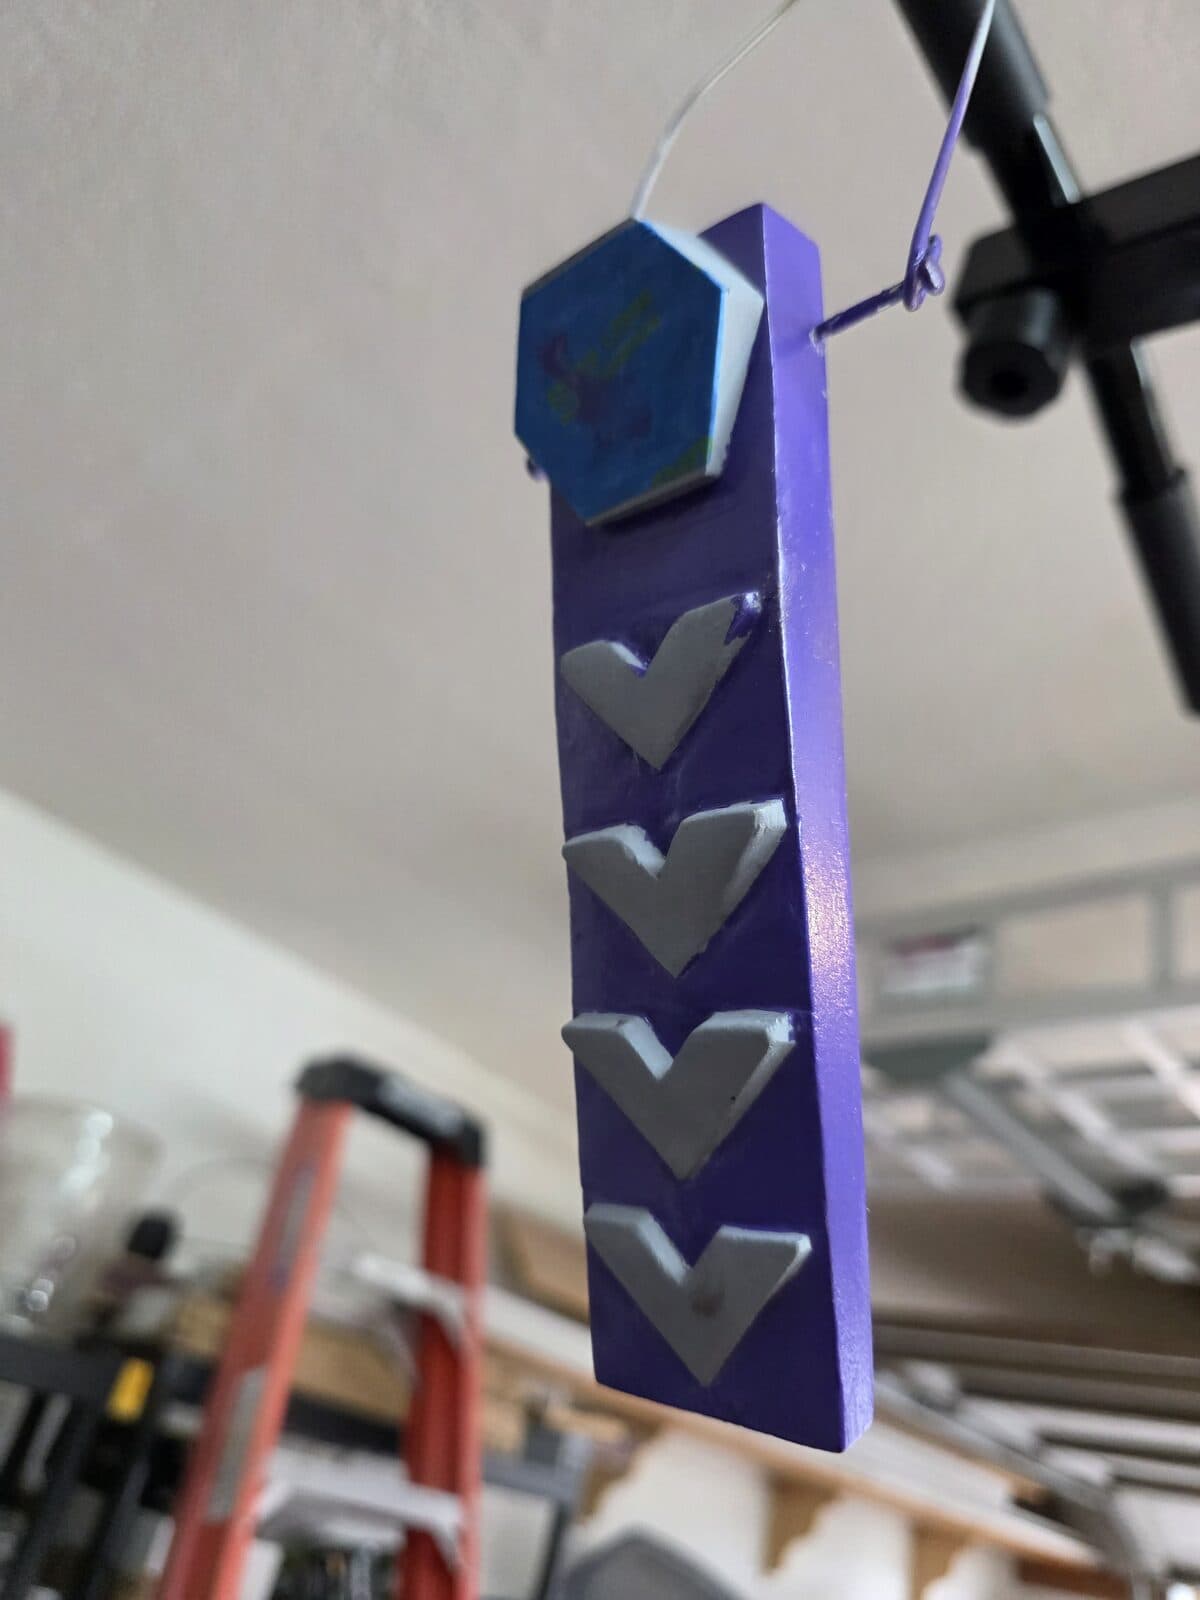
Painting, the careful way
The car was going to be purple with the chevrons and logo in their original Awana colors. To get there cleanly, we had to mask before painting the body.
I cut painter's tape to the shape of each carved chevron and stuck it down precisely over each one. Same for the hex logo at the front. Two coats of purple spray paint over the whole body, then I peeled the tape. The chevrons and the logo were exposed again — clean, unpainted, still in raw filler-primer gray. Now it was Karen's turn.
She painted each chevron with acrylic paint markers — easy to grip, precise tips, opaque coverage in one or two passes. Yellow first, then green, then blue, then red, in order down the chevron stack. Then the green-and-white hex of the T&T logo. Two careful afternoons. She got everything inside the lines. At nine, she has the steadiness for it.
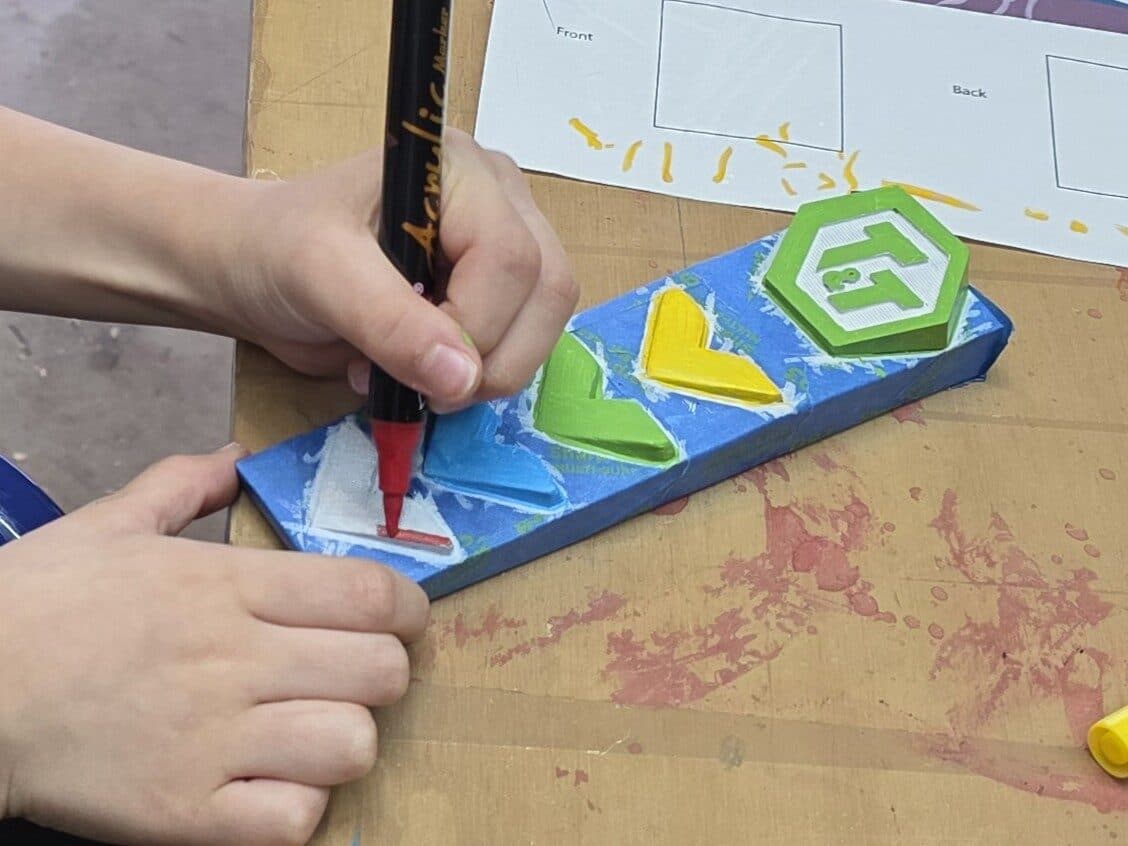
The glitter
This was Karen's add. After the markers dried, she wanted glitter on the chevrons — each chevron in glitter that matched its color. Yellow glitter on the yellow chevron, green on the green, and so on.
I tried to talk her out of it. Glitter on a derby car is a top-side decoration that adds visible mass above the center of gravity, which is mechanically the wrong place to add weight. I had budgeted the car's five ounces around no glitter.
She did not care. She wanted glitter. So we did glitter.
The application was simple. For each chevron, I brushed a thin layer of clear-drying craft glue over the painted surface. While the glue was wet, Karen sprinkled glitter of the matching color. Let it dry an hour. Tapped the car gently over a sheet of paper to shake off the loose glitter. Repeated for the next chevron.
Total weight added: less than a tenth of an ounce. In practice it changed nothing. My instinct to argue was overcautious. I was wrong.
Clear coat and engineering
After the glitter cured, I sprayed two coats of clear acrylic over the whole car — protects the paint, seals the glitter, pulls the finish together.
The engineering underneath was the same as Elias's shark: PRO Driller for extended wheelbase and canted rear axles, one raised front wheel, the other front axle bent into a rail rider configuration. At nine, Karen is not yet ready to do this work. The PRO Driller needs care with a power drill, and the axle bending needs a vise and a steady hand. Maybe at eleven or twelve she will start taking it over. Not yet.
Race day
Karen's T&T car came in second place in speed and third place in design within her division.
The second place in speed was a good result. The car was up against tighter competition than Elias's shark — older kids in her division have had more years to learn what works. The engineering held up.
The third place in design was against a strong field. The first-place winner in her division was a sewing-themed car — built around the visual vocabulary of needles and thread and fabric. The second-place winner was a pickup truck with a sculpted toolbox in the bed. Three cars at the top, all built around strong personal themes: a sewing kid's car, a tool kid's car, and Karen's T&T-Awana identity car. The judges were picking between three legitimately good theme executions on a particular afternoon.
Karen took the result well. She has had to learn that you can do good work and still come third, and that this is not the same as the work being bad. She watched the sewing car win the design award, she clapped, and she went back to looking at her own car. She has the equanimity that some adults still do not.
Watching her handle it that way was worth more than the trophy would have been.
What changes at nine
Looking back at the two builds, the differences were not about what we built. Both were carved-and-3D-printed hybrids with hidden tungsten weight enclosures and painstaking body finishing. The engineering was identical.
What was different was who designed it and who did the surface work. Karen designed her car from scratch and painted every visible detail with her own hands. Elias picked a shark from a catalog and handed me the build. Both are legitimate kinds of ownership. They are not the same kind.
If you are building a derby car with a kid in the seven-to-eleven range, your job is closer to mine with Karen than mine with Elias. The kid can design. The kid can paint precise details. The kid can argue with you about glitter and be right.
Two things worth saying for parents at this stage:
Use Tinkercad together if your kid likes computers. A nine-year-old can build a complete 3D model of their car in an afternoon. The model becomes the carving template, the 3D print files, and the conversation. The CAD model is a contract — both of you can see exactly what the finished car will be.
Do not over-engineer the kid out of their own car. It is tempting, with Tinkercad and 3D printing and automotive body work in your repertoire, to take over the parts that are technically interesting. Don't. The car needs to look like the kid built it, even if you built most of it.
Karen's car looks like a nine-year-old designed it, because a nine-year-old did.
Glitter and all.